目次

概要 & Scope
Able Hardware tests and verifies welded metal shelving, welded frames, and industrial carts/trolleys to confirm three things: 溶接の完全性, dimensional conformity, and functional performance. We select methods by risk, criticality, and cost so you get reliable quality without overspecifying. Units are metric (んん, ℃, μm, N, kg).
Why testing matters for welded shelving, frames & carts
Welded assemblies fail in different ways—cracks at fillet toes, distortion that breaks fit-up, coatings that peel at edges, casters that flatten under load. A right-sized test plan filters early defects, validates production stability, and prevents field complaints. For cost-effective assurance, we combine Visual/NDT screening, destructive procedure validation, dimensional audits on CTQs, and product-specific functional tests.
Where this page sits in the Quality hub
This guide is part of our Quality system alongside acceptance criteria, QA documentation, and process controls.
ビジュアル & NDT Methods
VT acceptance vs ISO 5817 and sampling (ISO 2859-1)
We start with Visual Testing (VT) per ISO 17637, applying acceptance levels from ISO 5817 to control surface flaws (気孔率, undercut, overlap, ひび割れ, arc strikes). When a sampling plan is specified, we follow ISO 2859-1 with agreed AQLs and lot definitions. General NDT rules reference ISO 17635.
PT, MT, UT, RT — selection by risk, coverage & 料金
- PT (ISO 3452-1): Detects surface-breaking cracks on non-magnetic materials and final-finish surfaces.
- MT (ISO 17638; acceptance per ISO 23278): Efficient for ferromagnetic steels; ideal for highly stressed bracket joints and handle welds.
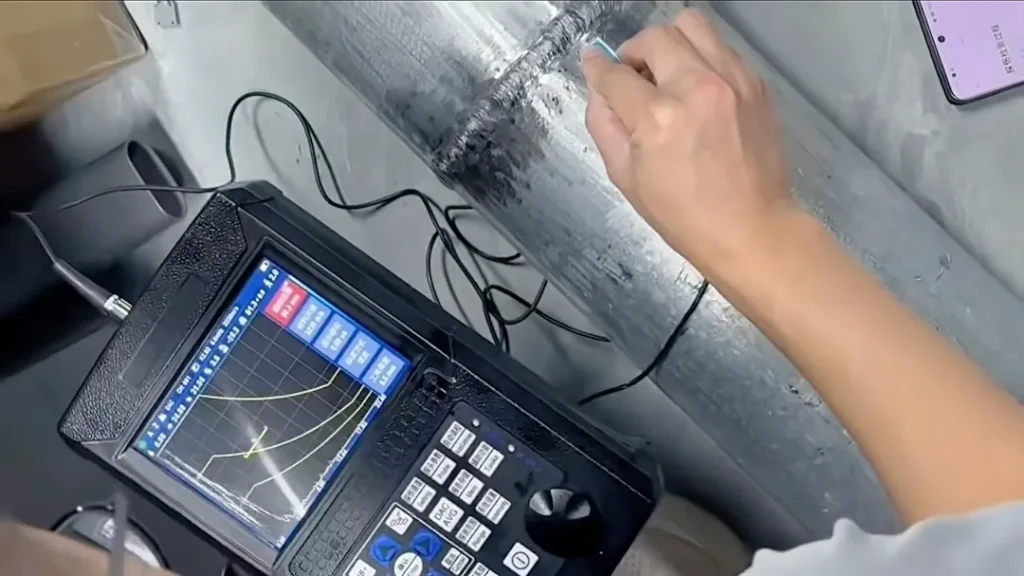
- UT (ISO 17640): For critical full-penetration joints in frames; good depth coverage without radiation.
- RT (ISO 17636-1/-2): Highest evidence for internal defects; reserved for safety-critical welds due to cost and access needs.
Reporting deliverables and traceability
Each NDT lot produces an illustrated report: method, scope, coverage percentage, equipment IDs, calibrated settings, indications vs accept/reject criteria, traceable to a weld map (joint numbers) and part serial/heat/finish lots.
Destructive Testing (Procedure & Validation)
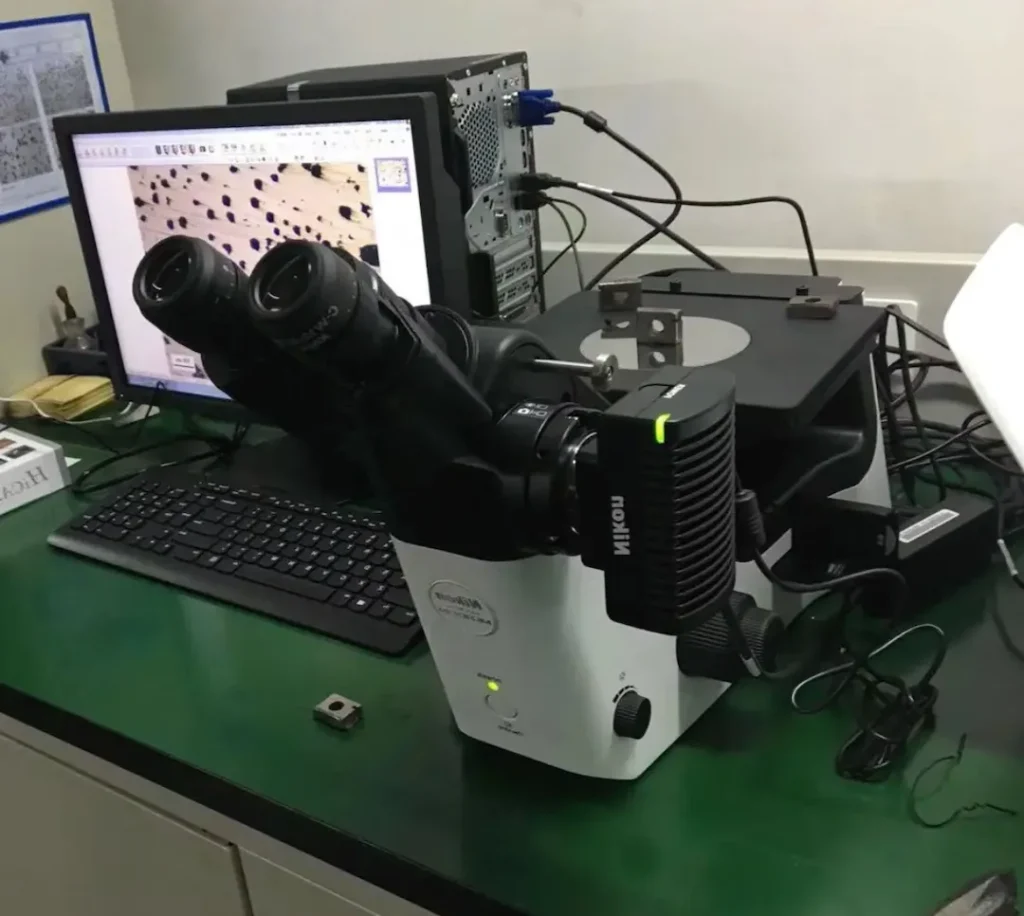
Macroetch/microstructure and hardness traverses
- Macro/micro exam (ISO 17639): Confirms penetration, fusion line, leg length, and HAZ geometry.
- Hardness (ISO 9015-1): HV5/HV10 traverses across weld/HAZ/base validate heat input and potential brittleness—especially after finishing cycles.
引張, bend, fillet fracture, そして影響 (when applicable)
- Transverse tensile (ISO 4136) そして bend tests (ISO 5173) demonstrate joint strength/ductility.
- Fillet weld fracture (ISO 9017) is a quick screen for throat integrity on shelf supports.
- Charpy impact (ISO 148-1) is added when low-temperature service is specified.
Dimensional Verification & GD&T
ISO 13920 vs ISO 2768; datum strategy and CTQs
General welded tolerances follow ISO 13920—Class b (precise) または C (標準) by agreement; Class D may be used for non-critical fabrications. Machined features default to ISO 2768 (m) unless GD&T is defined. We agree the datum scheme (A/B/C) and Critical-to-Quality (CTQ) dimensions upfront to avoid over-inspection.
Checking fixtures vs CMM/laser scan; FAI & periodic audits
- Checking fixtures enable fast go/no-go verification on frames and sub-frames.
- CMM or laser scan supports FAI and periodic audits, capturing flatness, perpendicularity, parallelism, and positional tolerances across the full envelope.
- Thermal cut quality records follow ISO 9013.
Functional Tests — Shelving
UDL load/deflection criteria, stability/anchoring, adjustable pitch checks
- Load & deflection: Shelves tested under uniformly distributed load (UDL) with agreed criteria (例えば。, L/200–L/240).
- Bay stability: Anchoring/anti-tip provisions verified; shelf retention/engagement checked after load cycling.
- Adjustable pitch: Upright hole pattern and bracket engagement verified over the full pitch range.
Optional project standards (EN 15512/SEMA) when required
For warehouse and static storage, we can align with EN 15512 and SEMA guidance by project, translating requirements into measurable acceptance tests.
Functional Tests — Carts & Trolleys
Static/dynamic load, caster durability, brake holding, push/pull ergonomics
- Static & dynamic load tests: Frame stiffness and welds under rated kg; dynamic rolling with obstacles and turns.
- Caster durability: Cycle tests and wheel tread inspection; ISO 22883/22884 references for industrial casters/wheels.
- Brakes/parking: Holding tests on level/ramp; handle mount integrity.
- Ergonomics: Push/pull force targets (N) agreed with your EHS team.
References: ISO 22883/22884, EN 1757-3, ISO 12100 risk assessment
We incorporate EN 1757-3 for platform trucks/trolleys safety checks and apply ISO 12100 risk assessment to the overall test plan.

仕上げ & Corrosion Verification
Salt spray, adhesion, 摩耗, and coating thickness records
- Corrosion: ISO 9227 neutral salt spray to an agreed hour target for powder/zinc systems.
- Adhesion: ASTM D3359 cross-hatch; Abrasion: ASTM D4060 Taber cycles.
- 厚さ: Magnetic gauge logs (μm) by location, including weld toes/edges.
Edge protection and masking for welded assemblies
We define edge radiusing, weld spatter removal, and masking lines to prevent thin edges and ensure continuity at fillet roots, ヒンジ, and interfaces.
Robotic Welding Standards & Process Control
WPS/PQR, operator/robotic setter qualifications, equipment verification
- Procedure qualification: ISO 15614-1 (または AWS D1.1 if specified).
- Personnel: Welders per ISO 9606-1; robotic operators/setters per ISO 14732.
- Equipment: Calibration/verification per ISO 17662; quality system aligned with ISO 3834 scope per contract.
Fixtures, weld sequencing, distortion control, parameter logging
Dedicated fixtures, validated weld sequences, controlled heat input, and logged parameters (wire feed, travel speed, voltage/current) deliver repeatable bead geometry and minimized distortion.
ドキュメンテーション & Frequency
What we provide (COA/OQA, 三次元測定機, PPAPの基本) and when
Lot-based COA/OQA, 三次元測定機 reports for FAI/periodic audits, and PPAP Level 2/3 packs (Control Plan, PFMEA, Dimensional Results, WPS/PQR, material/finish certificates, PSW) as agreed in the PO.
File formats (PDF + CSV/XLS) and naming convention
Reports in PDF with data tables in CSV/XLS. Suggested naming: AH-[Project]-[PartNo]-[Rev]-[Lot/Serial]-[ReportType]-YYYYMMDD.pdf
料金 & Lead Time Considerations
How class (B/C/D), NDT scope, functional testing & sampling affect cost/time
- Tighter ISO 13920 Class B and added GD&T drive fixture precision and audit effort.
- MT/UT/RT increase cost with coverage; choose them for safety-critical joints.
- Functional cycles (casters, brake holding) extend schedule due to setup and runtime.
- Sampling to ISO 2859-1 balances risk and throughput.
Practical guidance to specify “just tight enough” testing
- Identify CTQs tied to failure modes.
- Use VT+targeted NDT on high-risk welds only.
- Reserve DT for procedure validation/change points.
- Apply functional tests that mirror real use (UDL, ramps, obstacles).
- Keep documents lean but complete.
よくある質問
Which NDT should I choose?
Start with VT to ISO 17637/5817, then add MT for ferromagnetic steels or PT for non-magnetic parts. Use UT/RT only where internal quality is critical.
Do I need destructive tests every lot?
Usually no. Use DT for procedure validation, re-qualification after significant changes, or as part of PPAP; routine lots rely on VT/NDT and dimensional audits.
How do shelving tests differ from cart tests?
Shelving focuses on UDL deflection and bay stability; carts add dynamic rolling, caster durability, braking, and ergonomic push/pull forces.
What dimensional checks are typical?
ISO 13920 (紀元前) for welded geometry, ISO 2768 (m) for machined features, plus GD&T on flatness/perpendicularity/position for interfaces; CMM/fixtures verify CTQs.
How are finishes verified?
Salt spray to ISO 9227, adhesion per ASTM D3359, abrasion per ASTM D4060, and coating thickness logs (μm) with attention to weld toes/edges.
What’s in the documentation set?
COA/OQA, CMM results (FAI/periodic), and PPAP L2/3 (Control Plan, PFMEA, Dimensional Results, WPS/PQR, certs, PSW) as defined in the PO.
How do we set sampling plans?
We apply ISO 2859-1 with agreed lot sizes/AQLs; critical welds may receive 100% VT and targeted NDT.
Call to Action
Upload your drawings and test requirements (公差, NDT scope, functional cycles), and we’ll propose a right-sized plan and lead time. Get a custom test plan & quote または upload RFQ
引用を要求
Related 品質 リソース:


